The cleaning methods used by homeowners and facility managers lead to problems because streaky fingerprints and water spots and stubborn stains remain on surfaces. The problem is not the effort invested—it is the methodology itself. Conventional cleaning methods used in homes destroy stainless steel surfaces because they break the protective chromium oxide layer that defends against corrosion.
The process for cleaning stainless steel begins with understanding that this metal only achieves stain resistance through its protective film which prevents staining. The incorrect cleaning agents remove this film which results in oxidation and permanent damage to the underlying metal. The methods used to clean glass and porcelain and chrome do not work on stainless steel and they also create damage.
The guide explains complete cleaning methods which include basic DIY home methods and advanced industrial passivation techniques. The training will teach you how to maintain 304 and 316 stainless steel at different grades with maintenance requirements while providing home cleaning methods that cost less than one dollar and professional surface restoration methods and maintenance plans based on specific environmental conditions.
Understanding Stainless Steel Cleaning Basics

The passive chromium oxide layer which develops automatically on stainless steel surfaces creates a protective barrier that prevents corrosion. The transparent film, which measures 0.0000001 inches in thickness, protects the base metal by blocking contact with environmental contaminants. Cleaning the surface according to correct procedures will help maintain and restore the protective layer, while incorrect cleaning methods will lead to its destruction.
The misconception that stainless steel requires no maintenance leads to premature failure. The material provides better protection against corrosion than carbon steel, yet it needs frequent cleaning to remove materials which block oxygen access or create spaces where corrosion begins. Stainless steel, which receives proper maintenance, can endure for many years, while untreated stainless steel starts showing rust within months under severe environmental conditions.
The Role of the Passive Layer
The process of cleaning stainless steel accomplishes two essential tasks. The process of cleaning stainless steel removes dirt and enables the protective layer to rebuild itself. The protective oxide film protects chromium, which becomes visible when you clean away dirt, grease, and other deposits. The self-healing ability of stainless steel creates a protective mechanism that stays within the material, while coated materials only offer exterior protection.
The specific cleaning products lead to rapid chromium removal from surfaces because they eliminate chromium faster than it can form new oxide layers. Bleach, together with hydrochloric acid and abrasive scrubbers, creates damage to the passive layer at a rate that exceeds the speed of natural regeneration. The process of improper cleaning creates permanent damage, which results in pitting and staining, and structural corrosion.
Grain Direction: Why It Matters
The surface of brushed and polished stainless steel contains a grain pattern that results from the manufacturing process. The cleaning process, which moves across the grain pattern, allows debris to enter the tiny grooves, resulting in scratches that capture dirt and damage the protective coating. The surface should be cleaned by following the direction of the grain lines, which appear as faint striations on the surface.
The 8K mirror-polished finish does not require any specific grain direction because its surface design has no textured elements. The majority of appliances and sinks, and industrial equipment use brushed finishes which operate at No. 4 and HL specifications, because the direction of their grain pattern determines how well they can be cleaned and their overall appearance.
Essential Cleaning Supplies

Proper tools prevent damage while maximizing cleaning effectiveness. The wrong cloth or brush creates scratches that become nucleation points for future corrosion.
Required Materials
Microfiber cloths: These synthetic fiber cloths trap oils and particles without scratching. Use color-coded cloths—one for cleaning, one for drying, one for polishing—to prevent cross-contamination. The process requires frequent replacement of cloths because used cloths contain hidden debris that causes surface damage.
Soft sponges: Non-abrasive cellulose or foam sponges apply cleaning solutions without mechanical damage. The use of scouring pads must be avoided because even the “non-scratch” types contain tiny abrasive particles.
Spray bottles: Fine-mist spray bottles distribute cleaning solutions evenly without oversaturation. The bottles must have clear labels which will stop users from choosing incorrect solutions.
Soft-bristle brushes: For textured surfaces or crevices, use brushes with nylon or natural bristles. Brass or steel bristles create permanent scratches on stainless steel surfaces.
What to NEVER Use on Stainless Steel
Steel wool and scouring pads: These create deep scratches that trap moisture and chlorides, initiating corrosion that spreads beneath the surface. Even “stainless steel” scouring pads contain carbon steel particles that embed in the surface and rust.
Bleach and chlorine cleaners: Sodium hypochlorite attacks the passive layer, causing pitting and brown staining within hours. Chlorine exposure is particularly damaging to 304 grade in warm, humid conditions.
Ammonia-based glass cleaners: Products like Windex contain ammonia that evaporates quickly but leaves residue and can discolor certain stainless steel finishes over time.
Abrasive powders: Cleansers containing silica, feldspar, or calcium carbonate scratch the surface, creating pathways for corrosion initiation.
Toilet bowl cleaners: These often contain hydrochloric acid, which aggressively attacks all stainless steel grades.
DIY Homemade Stainless Steel Cleaners
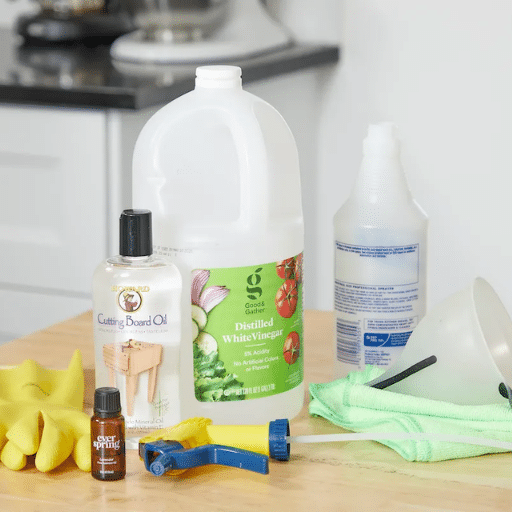
Commercial stainless steel cleaners cost 6−12perbottle.EffectiveDIYalternativescostunder6−12perbottle.EffectiveDIYalternativescostunder1 per batch using common household ingredients.
Basic Vinegar Solution
Recipe: Equal parts white distilled vinegar and water (1:1 ratio)
Best for: Daily cleaning, fingerprint removal, light grease, water spots
Procedure: Mix in spray bottle. Spray surface lightly. Wipe with microfiber cloth following grain direction. Dry immediately with clean cloth to prevent new water spots.
Cost: Approximately $0.30 per 16-ounce batch
Caution: Do not leave vinegar on surface for extended periods. The mild acidity helps dissolve deposits but prolonged contact etches the surface over time. Always rinse and dry after cleaning.
Streak-Free Spray with Cornstarch
Recipe:
- 1.5 cups distilled water
- 1/4 cup white distilled vinegar
- 1/4 cup rubbing alcohol (70% isopropyl)
- 1 tablespoon cornstarch
- Optional: 5-10 drops essential oil for fragrance
Why it works: Cornstarch acts as a mild abrasive that polishes without scratching, while the alcohol accelerates evaporation, preventing streaks. This formulation mimics commercial cleaners at a fraction of the cost.
Procedure: Dissolve cornstarch in cold water first, then add remaining ingredients. Shake well before each use—cornstarch settles. Spray sparingly. Wipe immediately with grain direction using microfiber cloth. Buff dry.
Cost: Approximately $0.80 per batch
Baking Soda Paste for Tough Stains
Recipe: 4 tablespoons baking soda mixed with 1 quart warm water, or add water gradually to form thick paste for spot application
Best for: Burnt-on residue, rust spots, heat discoloration, stubborn stains
Procedure: Apply paste to stain. Let sit 15-30 minutes for tough deposits. Gently rub with soft cloth following grain direction. Rinse thoroughly. Dry immediately. For rust removal, longer dwell time (up to 1 hour) may be necessary.
Cost: Approximately $0.25 per application
Note: Baking soda is mildly abrasive. Use minimal pressure to avoid scratching. Test in inconspicuous area first on polished surfaces.
Oil Polish for Fingerprint Resistance
Recipe: Small amount of olive oil, mineral oil, or baby oil on microfiber cloth
Best for: Final polishing, fingerprint resistance, restoring shine
Procedure: After cleaning and drying, apply tiny amount of oil to clean microfiber cloth. Buff surface lightly following grain direction. Removes residual streaks and creates thin barrier against fingerprints.
Cost: Less than $0.10 per application
Caution: Use sparingly—excess oil attracts dust and creates greasy buildup. Do not use on surfaces that contact food without thorough subsequent washing.
Commercial Cleaning Products

While DIY solutions handle routine maintenance, certain situations require commercial formulations with specific active ingredients.
Bar Keepers Friend
Active ingredient: Oxalic acid
Best for: Rust removal, scale deposits, heat tint, tough stains
Usage: Apply powder or liquid to damp surface. Rub gently with grain direction using soft sponge. Rinse thoroughly within 5 minutes. Dry immediately.
Cost: $5-8 per container
Precaution: Oxalic acid is a chelating agent that dissolves rust by removing iron oxide. It is safe for stainless steel when used as directed but should not remain on surface for extended periods. Rinse thoroughly.
Weiman Stainless Steel Cleaner
Formulation: Petroleum distillates with mineral oil
Best for: Daily appliance cleaning, fingerprint resistance, routine maintenance
Usage: Spray on microfiber cloth (not directly on surface). Wipe with grain direction. Buff with dry cloth.
Cost: $6-10 per bottle
Advantage: Leaves thin protective film that resists fingerprints for several days. Popular for refrigerator and dishwasher maintenance.
3M Stainless Steel Polish
Formulation: Industrial-grade polish with protective coating
Best for: Heavy-duty industrial applications, restoration of heavily soiled equipment
Usage: Apply small amount to cloth. Work into surface following grain. Buff to shine.
Cost: $15-25 per container
Application: Industrial food processing, pharmaceutical equipment, marine applications requiring long-lasting protection.
Product Selection Guide
| Problem | Recommended Product | DIY Alternative |
|---|---|---|
| Daily fingerprints | Weiman or similar | Vinegar solution |
| Water spots | Bar Keepers Friend | Vinegar solution |
| Rust stains | Bar Keepers Friend | Baking soda paste |
| Heat discoloration | Bar Keepers Friend | Baking soda paste |
| Grease buildup | Degreaser + stainless cleaner | Dish soap + water |
| Restoration polishing | 3M Polish | Oil polish method |
Step-by-Step Cleaning by Application

Different applications require specific techniques based on exposure conditions and finish type.
Cleaning Stainless Steel Appliances
Refrigerators and Dishwashers:
- Remove loose debris with dry microfiber cloth
- Apply cleaning solution (vinegar mix or commercial cleaner) to cloth, not directly to surface
- Wipe with grain direction, working top to bottom
- Pay attention to handles—high-touch areas accumulate oils
- Dry immediately with clean cloth
- Apply oil polish if desired for fingerprint resistance
Ovens and Range Hoods:
- Remove grease filters and clean separately
- For baked-on grease, apply baking soda paste. Let dwell 30 minutes.
- Wipe with damp cloth following grain
- Clean with vinegar solution to remove residue
- Dry thoroughly
Frequency: Daily quick wipe for fingerprints; weekly deep clean for kitchens; monthly for low-use appliances
Cleaning Stainless Steel Sinks
Daily Maintenance:
- Rinse after each use
- Spray with vinegar solution
- Wipe dry with microfiber cloth—prevents water spots
Deep Cleaning:
- Wet sink surface
- Sprinkle baking soda lightly
- Scrub gently with soft sponge following grain
- Rinse thoroughly
- Dry completely
- For shine, apply few drops of mineral oil to cloth and buff
Water Spot Removal:
Soak paper towels in white vinegar. Lay on spotted areas for 15 minutes. Remove and rinse. Dry immediately.
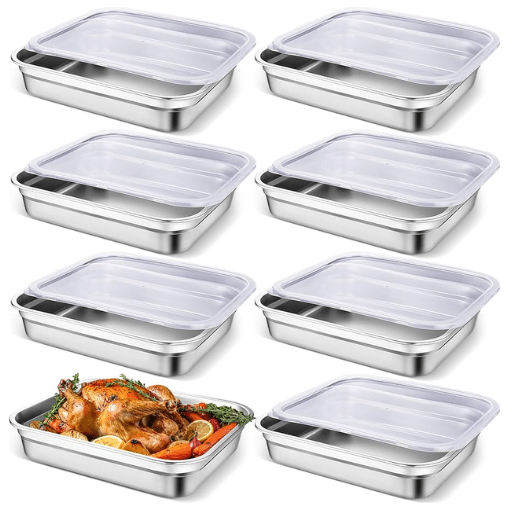
Cleaning Stainless Steel Cookware
Burnt-On Food:
- Fill pan with water and 2 tablespoons baking soda
- Bring to boil, then simmer 15 minutes
- Allow to cool
- Scrub gently with non-abrasive sponge
- For remaining residue, apply baking soda paste and let sit 1 hour
- Scrub and rinse thoroughly
Discoloration (Heat Tint):
Apply Bar Keepers Friend following package directions. Rub gently with grain. Rinse thoroughly. Repeat if necessary for heavy discoloration.
Important: Always dry cookware completely before storage to prevent water spots and potential corrosion initiation.
Cleaning Industrial Equipment
Post-Fabrication Cleaning:
After welding, machining, or cutting, stainless steel requires specialized cleaning to remove:
- Heat tint and oxides
- Cutting oils and lubricants
- Iron contamination from tools
- Shop dirt and debris
Procedure:
- Degrease with alkaline cleaner (sodium hydroxide solution or commercial degreaser)
- Rinse with clean water
- Apply pickling paste or acid bath (nitric/hydrofluoric for heavy scale, citric acid for light cleaning)
- Neutralize with baking soda solution
- Rinse thoroughly with deionized water for critical applications
- Passivate if required (see Passivation section)
Frequency: After every fabrication operation before equipment enters service
Grade-Specific Cleaning: 304 vs 316

Different stainless steel grades tolerate different cleaning agents. Using inappropriate cleaners on sensitive grades accelerates corrosion.
304 Stainless Steel Cleaning
Characteristics: Standard grade with good corrosion resistance but sensitivity to chlorides and acids
Recommended Cleaners:
- Mild dish soap and water
- Diluted vinegar solutions (1:1 maximum)
- Commercial stainless steel cleaners
- Baking soda paste for tough stains
Avoid:
- Concentrated acids (hydrochloric, sulfuric)
- Chlorine bleach and chloride cleaners
- Extended exposure to salt water without rinsing
- Abrasive scrubbers
Frequency: Clean every 3-6 months in indoor residential environments; every 2-4 weeks in industrial or coastal settings
Special Considerations:
- 304 is particularly sensitive to chloride stress corrosion cracking
- Never use chloride-based disinfectants (quaternary ammonium compounds with chlorides) for sanitizing 304 food equipment
- Rinse thoroughly after any cleaner application
316 Stainless Steel Cleaning
Characteristics: Superior corrosion resistance due to 2-3% molybdenum content; tolerates more aggressive cleaning
Recommended Cleaners:
- All 304-appropriate cleaners
- Stronger acidic cleaners (diluted phosphoric, oxalic)
- Chlorine-containing disinfectants (with proper rinsing)
- Industrial degreasers
Avoid:
- Hydrochloric acid (attacks even 316)
- Hydrofluoric acid
- Extended exposure to concentrated chlorides at elevated temperatures
Frequency: Clean every 6-12 months in most environments; every 1-3 months in marine or chemical processing applications
Special Considerations:
- 316 tolerates saltwater exposure better but still requires regular rinsing
- Accepts more aggressive sanitizing protocols for pharmaceutical and medical applications
- Better resistance to acidic foods and cleaning chemicals
Grade Identification Before Cleaning
If grade is unknown, assume 304 and use mild cleaners only. Aggressive cleaning of 304 thinking it is 316 causes damage. When in doubt:
- Use mild soap and water
- Avoid chlorides and strong acids
- Consult material certifications or supplier
Professional Passivation Cleaning
Passivation is a chemical treatment that removes free iron and contaminants while enhancing the chromium oxide layer. It is essential after fabrication and periodically during equipment lifetime.
When Passivation Is Required
- After welding, cutting, grinding, or machining
- When iron contamination is suspected (rust spots on “stainless” steel)
- Before equipment enters food, pharmaceutical, or medical service
- When surface shows signs of contamination or corrosion initiation
- As periodic maintenance in critical applications
Citric Acid Passivation (Preferred Method)
Advantages: Environmentally friendly, non-toxic, biodegradable, safe for workers
Solution: 10-20% citric acid in water
Procedure:
- Thoroughly clean surface to remove oils and debris
- Immerse or apply citric acid solution
- Maintain 120-150°F (49-66°C) for 20-30 minutes
- Rinse with clean water (deionized for critical applications)
- Dry completely
Testing: Copper sulfate test confirms passivation success—surface should not show copper plating (indicates no free iron)
Nitric Acid Passivation (Traditional Method)
Solution: 20-50% nitric acid in water (concentration depends on contamination level)
Procedure:
- Pre-clean thoroughly
- Immerse in nitric acid solution at 120-140°F for 20-30 minutes
- Rinse thoroughly with clean water
- Neutralize with baking soda solution if required
- Final rinse and dry
Safety: Nitric acid requires proper ventilation, personal protective equipment, and acid-resistant containers. Citric acid is preferred for most applications due to safety advantages.
Electrochemical Cleaning
Technology: Combines electricity, heat, and neutral chemistry to clean and passivate simultaneously
Applications: Weld cleaning, spot treatment, field repair where immersion is impractical
Advantages: No hazardous acid baths, faster processing, cleans and passivates in one step
Removing Specific Stains and Problems

Water Spots and Hard Water Stains
Cause: Mineral deposits from evaporating hard water
Removal:
- Soak paper towels in white vinegar
- Lay on spotted areas for 15-30 minutes
- Remove towels and wipe surface
- Rinse with clean water
- Dry thoroughly
Prevention: Dry surfaces immediately after water contact; use water softener if hard water is persistent problem
Rust and Oxidation
Cause: Iron contamination, chloride exposure, or damage to passive layer
Removal:
- Apply Bar Keepers Friend paste
- Rub gently with grain direction
- For severe rust, extend dwell time to 1 hour
- Rinse thoroughly
- Evaluate—if rust returns within days, material may be wrong grade for the environment or requires professional passivation
Important: Recurring rust on “stainless” steel indicates either wrong grade selection (201 instead of 304/316) or environmental conditions exceeding material capabilities.
Heat Discoloration (Gold/Blue/Brown)
Cause: Oxidation from excessive heat during cooking or welding
Removal:
- Apply baking soda paste
- Let sit 30 minutes to 1 hour
- Rub gently with soft cloth
- For stubborn discoloration, use Bar Keepers Friend
- Rinse and dry
Note: Severe heat tint may require professional refinishing if it penetrates deeply into surface
Scratches and Surface Damage
Light Scratches:
- Clean area thoroughly
- Apply stainless steel polish
- Buff with grain direction using soft cloth
- Repeat until scratch blends with surrounding surface
Deep Scratches: Require professional refinishing. Attempting to sand or grind deep scratches creates more damage and corrosion susceptibility.
Maintenance Schedules by Environment
Proper cleaning frequency prevents buildup that becomes difficult to remove and protects the passive layer from cumulative damage.
Indoor Residential
Daily: Wipe fingerprints with dry microfiber cloth
Weekly: Light cleaning with vinegar solution for high-touch surfaces
Monthly: Deep clean appliances, sinks, cookware
Quarterly: Inspect for early signs of staining or corrosion; address immediately
Commercial Kitchen
Daily: Clean and sanitize all food-contact surfaces; wipe appliances
Weekly: Deep clean sinks, hoods, and heavy-use equipment
Monthly: Inspect and address any staining; polish if needed
Quarterly: Professional assessment of heavily used equipment
Industrial Applications
Per Shift: Clean food processing equipment; wipe chemical handling surfaces
Weekly: Deep clean of all stainless equipment
Monthly: Inspection for corrosion initiation; passivation if needed
Annually: Professional passivation of critical equipment
Coastal/Marine (316 Grade Recommended)
Daily: Rinse with fresh water if exposed to salt spray
Weekly: Clean with mild soap and water
Monthly: Deep clean and inspect for corrosion
Quarterly: Passivation treatment if equipment shows signs of contamination
FAQ
Can I use vinegar on stainless steel?
Yes, diluted white vinegar (1:1 with water) is safe for routine cleaning. However, do not leave vinegar on the surface for extended periods, and always rinse and dry after cleaning. For 304 grade in sensitive applications, limit vinegar use to occasional cleaning rather than daily sanitizing.
How do I clean stainless steel without streaks?
Use the cornstarch-based DIY cleaner or a commercial product with alcohol content. The key is immediate drying—never let cleaning solution air dry. Wipe with grain direction using microfiber cloth, then buff dry immediately with clean cloth.
Is 304 or 316 stainless steel easier to clean?
316 tolerates stronger cleaners and requires less frequent maintenance, making it “easier” in aggressive environments. However, for routine household cleaning with appropriate products, both grades clean equally well. 316’s advantage appears in industrial, marine, or chemical environments.
Can I use Magic Eraser on stainless steel?
No. Magic Erasers are melamine foam, a micro-abrasive that scratches stainless steel surfaces. While initial results may look acceptable, repeated use creates microscopic scratches that trap contaminants and lead to corrosion.
How often should I clean stainless steel?
Frequency depends on environment: indoor residential requires monthly deep cleaning; commercial kitchens need daily sanitizing; industrial applications require per-shift cleaning for food contact; coastal/marine installations need daily fresh water rinsing. See Maintenance Schedules section for detailed recommendations.
What is the best commercial stainless steel cleaner?
Bar Keepers Friend excels at stain and rust removal. Weiman provides good daily maintenance with fingerprint resistance. For industrial applications, 3M polish offers heavy-duty protection. The “best” choice depends on your specific cleaning challenge.
How do I remove scratches from stainless steel?
Light surface scratches can often be buffed out with stainless steel polish applied with grain direction. Deep scratches require professional refinishing—attempting DIY repair typically worsens the damage and creates corrosion vulnerabilities.
Why does my stainless steel rust?
Rust indicates either: (1) wrong grade for environment (201 instead of 304/316), (2) exposure to chlorides or corrosive chemicals without proper cleaning, (3) iron contamination from carbon steel tools or nearby welding, or (4) damage to passive layer from improper cleaning. Identify the cause to prevent recurrence.
Conclusion
The proper maintenance of stainless steel materials results in equipment durability that exceeds three decades while maintaining its original aesthetic and sanitary conditions. The key principles—clean with grain direction, avoid chlorides and abrasives, dry immediately, and match cleaning intensity to grade and environment—apply whether you are maintaining kitchen appliances or industrial processing equipment.
You should treat stainless steel as an investment. The time spent on proper cleaning prevents costly replacement and maintains the corrosion resistance that justifies the material premium over carbon steel. The cleaning process for 304 grade requires gentler methods and more frequent upkeep because its corrosion protection comes at reduced strength. The appropriate cleaning protocols enable 316 grade to handle aggressive environments.
You should consult a materials engineer when routine cleaning fails to restore appearance and when “stainless” surfaces show rust. These symptoms often indicate wrong grade selection or environmental conditions requiring professional assessment.
Our technical team provides assistance with your questions regarding stainless steel grade selection maintenance protocols and material specifications for your application. LIANYUNGANG DAPU METAL CO., LTD supplies certified 304 and 316 stainless steel with surface finishes optimized for your specific cleaning and maintenance requirements.